|
Back to top
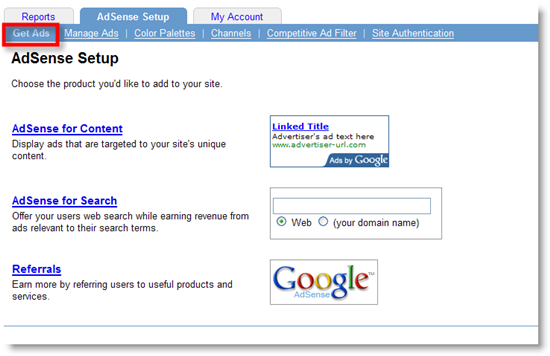
2. Next, select the ad type. Since you'll be creating a standard ad
unit, choose the Ad Unit radio button. To enable the widest
selection of ads to display on your pages, leave the drop-down set to Text
and image ads (default).

Back to top
3. Now, take a moment to customize your ads so they'll match the
look and feel of your site. Select the size you'd like from one of
Google AdSense different ad
formats, keeping in mind that larger and wider ad units tend to
perform better. (Get
tips on picking a format.)

Back to top
4. Next, select colors for your ads. You choose one of
Google AdSense predefined color palettes or create your own. You can view a sample of
how the ads will look based on the colors you've selected. You might
also want to review Google AdSense tips
on choosing colors.

Back to top
5. If you're interested in tracking the performance of your ad
unit, you can add a channel. Channels provide more granular reports
for the performance of specific ad units. If you haven't created a
channel yet, you can skip this step by clicking Continue.

Back to top
6. Next you'll be prompted to name your AdSense ad unit. This will
allow you to change the appearance or settings of your ad easily
through your account in the future, so select a name that will allow
you to easily identify this AdSense unit later. For more information
about this feature, check out our guide to Managing
your Ads.

Back to top
7. Finally, we'll provide you with the ad code for your AdSense ad
unit. Click anywhere inside the grey box to select the code, then
right-click and select copy. You can now paste the code into
the HTML source code of your site. For details and assistance adding
the code to your pages, Google recommend you review the Code
Implementation guide.

Back to top
|